 Back

Main, Lite and Secondary Devices in the Classroom
Before you enter a booked lesson, the pre-classroom screen asks how this device should join: Main, Lite or Secondary. Main is already selected on your first device, and most people never change it. Pick Lite when your device or connection struggles, and Secondary when you want a second device, such as a phone on a stand, to work as an extra camera.
Where to choose

- Open your lesson as usual (see Getting into Your Classroom).
- Find Select device: and its three buttons. On a computer they sit at the top of the panel with the other person's name; on a phone or a tablet held upright they run along the top of the screen.
- Click Main, Lite or Secondary. The selected button is highlighted in light blue. The small info icon above the buttons, on the right, explains Lite.
- Click Enter classroom. It becomes available 10 minutes before the lesson starts.
The choice lasts until you leave. To switch, leave the lesson, join again and pick another option before you click Enter classroom.
While you wait on this screen, the selection can change by itself when someone enters or leaves the lesson: if none of your devices is in the lesson yet, it goes back to Main. Check which button is highlighted just before you click Enter classroom.
If Secondary was selected and the selection then goes back to Main or Lite, your microphone stays off: turn it back on before you enter.
What each choice does
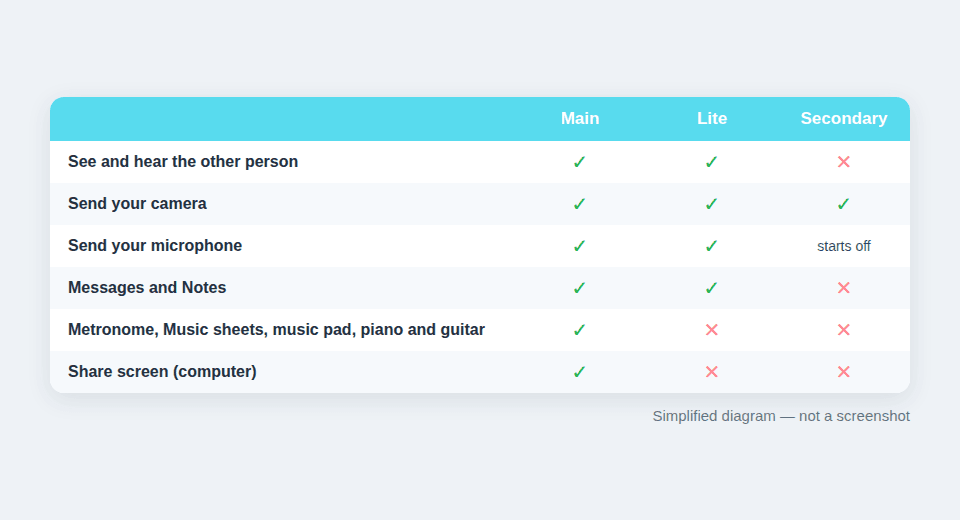
- Main is the full classroom. You see and hear the other person, send your camera and microphone, and get every tool, including Messages, Notes, Metronome, Music sheets, the music pad and the piano and guitar tools. Share screen is only on Main, on a computer.
- Lite is "a lighter version of the classroom designed to accommodate older and slower devices and devices that do not have access to a strong network connection." You still see and hear the other person and have your microphone and camera buttons, but the side panel offers only Messages and Notes. The metronome, music sheets, music pad, piano and guitar tools, screen sharing and background blur aren't there.
- Secondary turns the device into an extra camera. It sends its camera video but doesn't receive the other person's audio or video, and it has none of the classroom tools.
Teachers keep the Student participation switch on both Main and Lite.
When to choose Lite
Try Lite if the classroom is slow, your video stutters on an older computer or tablet, or your connection is weak and the tips in Classroom Device Diagnostics haven't helped. If your lesson relies on shared sheet music or the metronome, stay on Main if you can: when one person is on Lite, the other sees a note such as This feature is not available to the student. when pointing at those tools.
Using a second device as an extra camera
A second camera can show your hands on the keys or strings while your main camera shows your face.
- Join on your computer as usual with Main (or Lite).
- On the second device, sign in to the same Tissimo account and open the same lesson.
- Choose Secondary if it isn't selected already: when your main device is in the lesson, the second device selects it for you. Its microphone switches off, so your sound comes only from your main device. Leave it off to avoid echo. If it is on when you enter, you'll see the reminder Please ensure your main device is muted to prevent audio feedback.
- Point the camera where you want it, then click Enter classroom.
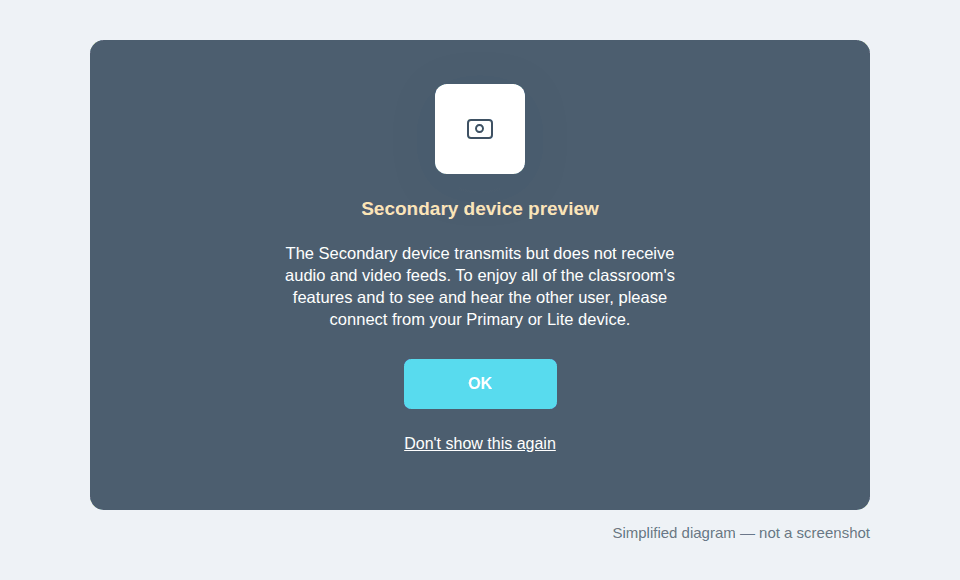
The second device then shows its own camera and the message Secondary device preview: "The Secondary device transmits but does not receive audio and video feeds." Click OK to close it, or Don't show this again to stop it appearing for your account. A dot next to the other person's first name shows whether they're in the classroom.
Each person can use one Main or Lite device and one Secondary device in a lesson at a time; Main and Lite count as the same slot.
What the other person sees
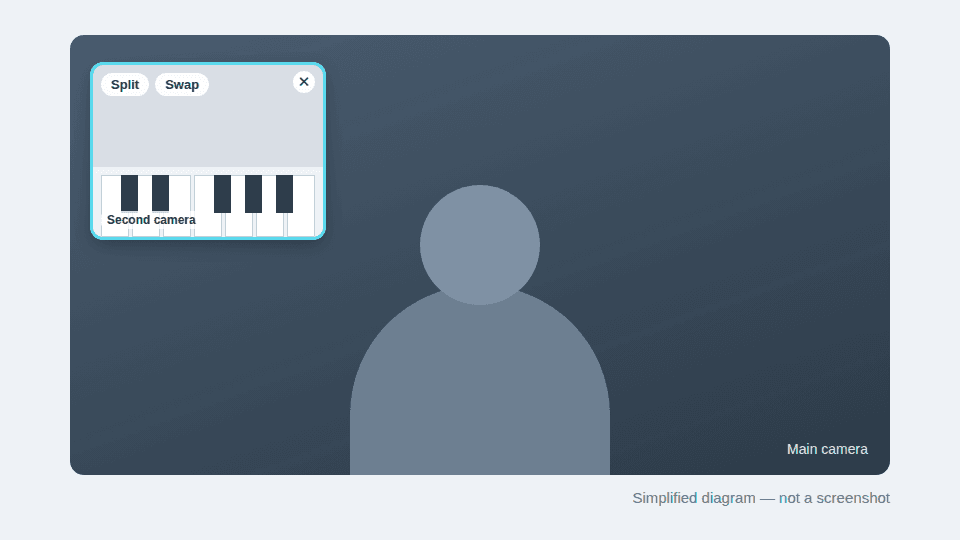
On a computer or tablet, your second camera appears as a small extra video that they can drag and resize. When they point at it, they can click Split and then Right or Left to show it side by side, Swap it with your main video, or hide it. Split, Swap and the hide button aren't available while you share your screen. On a computer, a small button brings a hidden video back; on a tablet held upright it stays hidden, so leave it open there. The extra video isn't shown on phone-sized screens, so it helps most when the other person uses a computer or tablet.
Music Classroom
This article describes booked lessons. The free Music Classroom shows only Main and Lite on its pre-classroom screen. To add a second camera there, click Second camera at the top of the screen to copy a link, open that link on your other device, then approve the device on your main device.

Comments