 Back

Cello Shifting: First to Fourth Position with Finger 1
Your first finger can play E3 in first position and A3 in fourth position on the cello’s D string. The finger number stays 1. The hand changes position. Learn those two destinations separately, hear the higher note, then connect them during a written rest.
This lesson is for you if your teacher has established first position, you can play comfortable separate bows, and your teacher agrees you are ready to shift. The destination is A3, the same pitch as your open A string. Keep the practice route on the D string; use open A separately to check the arrival.
You already have A3 as an open string. Here, playing it with finger 1 on D lets you practice moving the hand while the bow stays on one string. Shifting also lets cellists reach higher notes and choose fingerings for a passage. This is one practice route, not a rule that A3 must always be stopped on D. Cello Online’s overview explains these broader uses of shifting.
1. Separate finger 1 from positions I and IV
A finger number tells you which finger stops the string. A position label tells you where the hand is placed. Here, 1 means your left index finger, I means first position, and IV means fourth position. Say “first finger, fourth position” before playing the higher destination. That sentence keeps both instructions available.

Both notes use finger 1 on D: E3 in I and A3 in IV. E3 is in the third bass-staff space; A3 is on the top line.
Read the two notes left to right. The 1 above each belongs to the fingering; the Roman numeral identifies the position. The pitch rises from E3 to A3 even though the finger stays the same. Fourth position does not ask for finger 4.
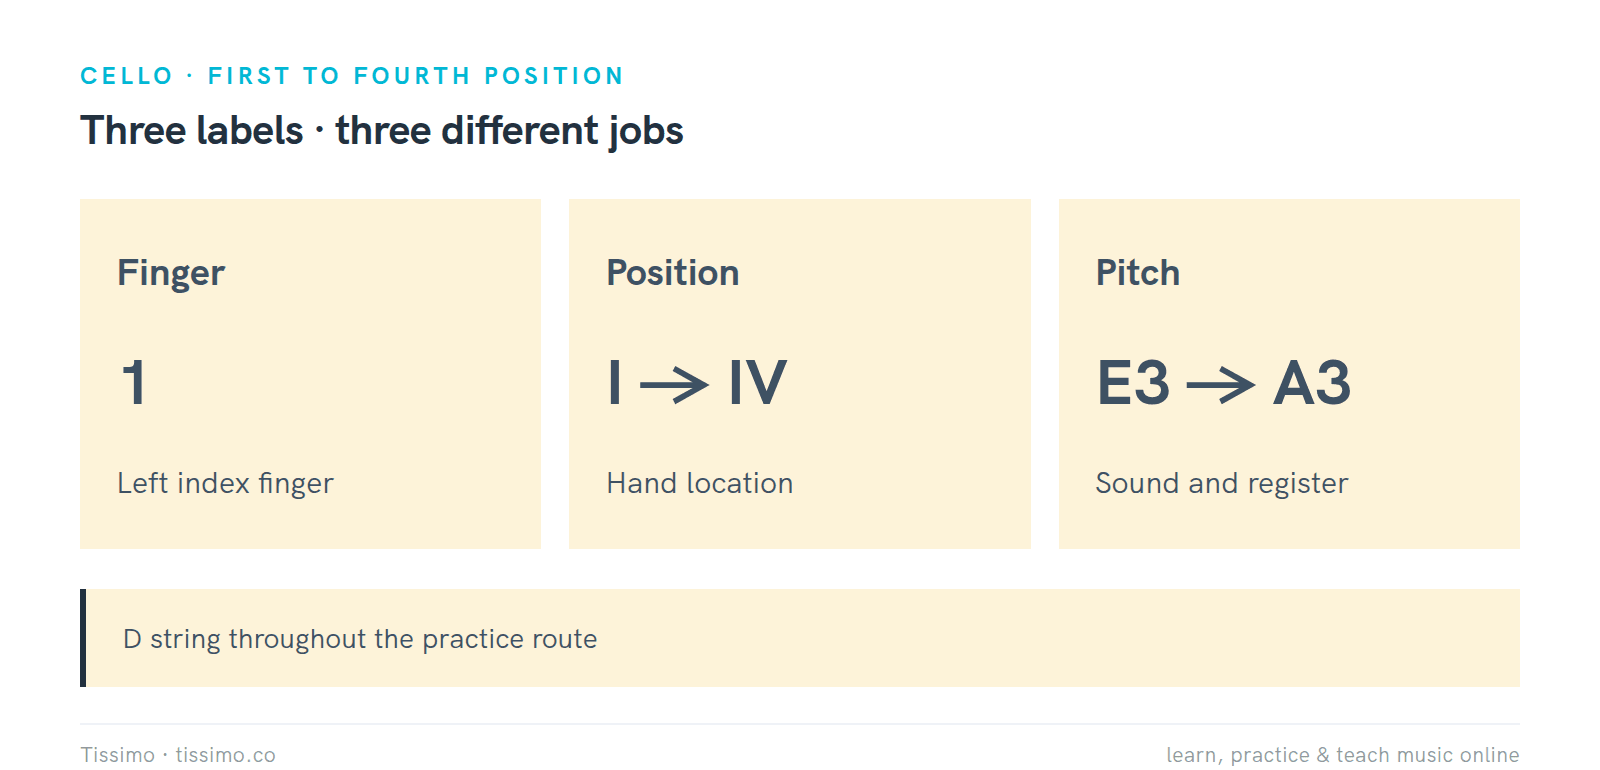
Finger, hand position, and octave register are different labels. The D-string instruction stays unchanged.
Cello Online’s shifting overview describes a shift as moving the hand to another place on the fingerboard. On the staff, A3 is higher than E3, but on the cello that higher pitch takes the hand down the fingerboard, toward the bridge and body — not up toward the scroll. To return to E3, the hand moves back toward the scroll. For this route, ask your teacher to demonstrate that relocation. Reaching toward A while leaving the hand organized around its old place is a different task from establishing the new position.
The One Finger, Two Positions handout keeps the vocabulary small: two D-string anchors, a separate A reference, and a four-bar route. Use its map to name the destinations. A schematic shows pitch order; it cannot locate your hand by measurement.

Two pitch destinations, not measured fingerboard locations. Establish both with your teacher.
Point to the lower anchor and say “D string, E3, finger 1, position I.” Then name the upper anchor the same way: “D string, A3, finger 1, position IV.” If either sentence feels uncertain, settle the labels before adding movement. You can practice this part with the cello resting safely in its case.
Test the distinction by covering the pitch names. Ask which finger is used at each destination: both answers are 1. Next cover the finger numbers and name the positions: I, then IV. Finally uncover the notes and say E3, then A3. Each pass answers a different question about the same pair.
2. Hear E3 and A3 before moving
Ask your teacher to play the two destinations, or listen to the handout’s separate pitch references. First hear E3, then A3. Try to imagine the arrival before you hear it again. You may hum in a comfortable register; the reference still determines the actual cello octave.

Hear E3, then imagine A3 during the rest before hearing the reference. The rise is a perfect fourth, five half steps.
E–F–G–A spans four letter names, including both endpoints. E3 to A3 is an ascending perfect fourth, five half steps. That interval describes the difference in sound. It does not give a distance in inches or tell you how far your arm should move. The Hearing Intervals sheet offers direction and interval comparisons with listening examples.
The octave number matters. We use middle C = C4, following the octave-register convention explained by the University of Puget Sound. A3 is below middle C; A4 is an octave above A3. In these bass-clef examples, the cello sounds as written. Saying only “A” leaves out information you need for this route.
In bass clef, E3 occupies the third space from the bottom and A3 the top line. Point to each before you bow. The Bass Clef & the Grand Staff sheet explains the F line and the surrounding note names. You need only its bass-staff landmarks here; all the playing examples remain in bass clef.
Check the sound and the written location together. Have someone point to one of the two notes while you name it, then hear the reference. If you can name A3 on paper but imagine a much higher A, replay the reference before moving. Reading the correct letter is only part of choosing this destination.
Yamaha’s cello overview identifies the standard open A as A3 and the open D as D3. Have your teacher confirm the tuning before making the comparison. A reference is useful only when you know which pitch it supplies; this lesson does not require you to adjust the pegs yourself.
3. Establish both anchors with your teacher
Begin at the familiar destination. With your teacher watching, play E3 using finger 1 in first position on the D string. Let the note sound, listen, and stop for the rest. Repeat without traveling to fourth position. Establish what a dependable starting note sounds and feels like today.

Repeat the teacher-established E3 in I with finger 1 on D. Keep the two-beat silence between attacks.
Now have your teacher establish A3 with finger 1 in fourth position on the D string. Start there independently and repeat the note. You are checking whether you can recognize and reproduce the destination before asking your hand to find it from somewhere else. Keep the separate bows you already know.
Cello Online’s fingering chart confirms these two D-string first-finger notes. A chart supplies the pitch relationship; your teacher supplies the setup and movement appropriate to you. Ask for a demonstration from your playing viewpoint, then let the teacher check each anchor individually on your own instrument.

Establish both anchors with your teacher before connecting them. Name the destination, hear it, then count.
Watch your teacher’s first-finger shift from E3 to A3. Notice the hand relocating along the neck and the thumb accompanying it, rather than finger 1 reaching away while the hand stays behind. Ask your teacher to show the contact and release used during this silent move, then check your version from the same viewpoint.
The opening same-finger discussion in Davidoff’s School of Cello Playing, translated by Miranda Wilson, describes the thumb and fingers moving together between positions. Use that coordination as something to observe; let your teacher choose the contact for this silent exercise. A paragraph cannot choose your thumb contact, elbow angle, or travel distance. If the route feels forced or uncomfortable, stop the connected attempt and bring that observation to the lesson.
Before connecting anything, give yourself a two-question check: “Can I name and play the starting E?” and “Can I name and play the destination A when my teacher establishes it?” If the second answer is uncertain, return to the isolated A. More repetitions of a guessed move would leave the destination uncertain too.
4. Move during the supplied rest
Each bar of our practice pattern contains a half note followed by a half rest in 4/4. The half rest is the small filled rectangle sitting on the staff’s middle line. In this 4/4 pattern, it means two silent quarter-note beats. In 4/4, there are four quarter-note beats in each bar: the top 4 counts the beats, and the bottom 4 identifies the quarter note as the beat unit. Play on beat 1, sustain through beat 2, and leave beats 3 and 4 silent. Continue counting through the rest. The next note begins on the following beat 1.

Sound first: play on 1–2 and rest on 3–4, as in the shifting route. Silence first: rest on 1–2 and play on 3–4. The second panel is a counting comparison only; it does not change the route.
The Half Note sheet reviews the hollow notehead and two-count duration. Puget Sound’s durational-symbol lesson places half notes and rests in the context of 4/4. Count the entire bar before adding a shift, so the silence has a clear beginning and end.

Count all four beats. At quarter note = 60, the half rest lasts two seconds; your teacher chooses the practice tempo.
First count “1, 2, 3, 4” while your teacher demonstrates E, silence, then A. Notice that the E finishes before the movement window. Next try the two-bar ascent with the movement your teacher has shown. Aim to arrive ready for the next beat 1, without making the rest disappear.

The IV label belongs to the A at the start of bar 2; prepare the hand during the preceding rest so you are ready to play that note on beat 1.
The handout’s model uses quarter note = 60. At that tempo, one beat lasts one second, so a two-beat rest lasts two seconds. This is an example window in the written music, not a required shift speed. Your teacher can choose a slower pulse or return to an unmetered demonstration before you try the counted version again.
Do not begin the hand’s travel early by cutting E short just to keep up. If you cannot preserve the note and the silence comfortably, pause the drill. Rehearse counting by itself, then let your teacher simplify the movement task.
Rehearse without the cello: say “E3,” count 1–2–3–4 for bar 1, then say “A3” and count bar 2. Point to each half rest on 3 and keep counting through 4. If the pulse falters, repeat the counting task before adding movement.
There is no instruction here to create an audible slide between the notes. The written rest separates them. A piano playback can model the two pitches and the timing of the silence; it cannot demonstrate the hand’s path or prove that you moved comfortably. Keep those questions for someone watching you play.
5. Compare stopped A3 with open A3
After an arrival, stop the route and make a separate pitch check. Play the stopped A3 on the D string, then the open A string, using separate bows. Listen for whether the pitch stays level. Your teacher can reverse the order or supply the open-string reference while you listen.

Stopped A3 on D (1) and open A3 on A (0) have the same target pitch. This separate check changes strings; the shifting route stays on D.
The open A is marked with fingering 0 and labeled as a reference on another string. The stopped A uses finger 1 and position IV on the D string. Both written notes are A3. This comparison temporarily uses the A string; the four-bar shifting route still uses only the D string.
The two notes can match in pitch while having different tone color—the quality that makes one sound brighter, darker, or otherwise different. The University of New South Wales distinguishes pitch from timbre: sounds can share pitch while differing in other audible qualities. Listen past the different character of the two string sounds and ask whether one is higher or lower.

Compare the pitch of stopped A3 with tuned open A3. Their tone color can differ even when the pitch matches.
Compare the stopped note with the tuned open A. Record “low,” “high,” “matched,” or “uncertain.” Name the result for the stopped note, not whichever sound came second. If it did not match, let your teacher guide the next attempt.
Try the comparison once more after a fresh arrival, rather than correcting the note repeatedly until you forget where you first landed. You want to learn what the attempt produced. An adjusted A may be useful practice, but it is different evidence from an A that matched on arrival.
Use the handout’s separate A reference when you need to hear the target away from a lesson. Its neutral piano tone supplies a pitch, not the sound of an open cello string. When you return to the instrument, check the actual tuned open A and let your teacher judge the movement.
6. Return to E3 and repeat the route
Now read the complete route aloud: E3, A3, A3, E3. The positions are I, IV, IV, I. Finger 1 remains in use, and every note in this line belongs on the D string. Count the half rest after every note, including the final E.

E–A–A–E stays on D with finger 1. Prepare the ascent during bar 1’s rest and the return during bar 3’s rest; repeat A without shifting in between.
There are two position changes: between bars 1 and 2, and between bars 3 and 4. The rest in bar 1 prepares the ascent; the rest in bar 3 prepares the return. Between bars 2 and 3, the repeated A stays in fourth position. Use that rest for silence and preparation without inventing another shift.

Compare adjacent destinations: change, stay, change. Count the rest even when the position stays the same.
For the return, hear E before you move. The descending interval is the same perfect fourth in the opposite direction. Check the final E against the teacher-established starting E, or ask the teacher to play the reference again. Open D is a different pitch, so it is not a unison reference for this E.

Return from A3 in IV to E3 in I on the D string. Count A on 1–2, prepare the return during 3–4, and start E on the next 1. Compare E with your established starting reference.
Keep the return as deliberate as the ascent. If A matched but the final E did not, you have learned something specific: the two directions need separate checks.
Before repeating the complete line, point out where the return is prepared. It is the rest after the second A, in bar 3. The rest after the first A precedes another A and needs no return. Following the notes with a pencil first can expose that planning error before you ask your hand to move. Work on the return with your teacher instead of automatically repeating the entire four-bar line faster. A successful arrival at one end does not assess the other end.
The Mark the Position Before the Shift exercise asks you to identify the position from the pitch, mark changes between bars, and fill position labels on playing routes. Its questions use a restricted vocabulary: finger 1 on the D string, with only these two anchors available.

Worked example: I–I–IV–IV. Only the rest in bar 2 prepares a shift. Repeated notes still receive separate attacks and full rests.
In this worked repeated-note example, E–E–A–A means I–I–IV–IV. Only the boundary between bars 2 and 3 changes position. The two repeated pairs still have separate attacks and full rests. They are not tied notes. Say the next destination during preparation so repeating a note does not become an automatic cue to move.
Try the paper questions before playing them. Cover the key, mark the positions, and explain every change. Then compare your answers with the printed key. A correct label shows that you planned the route; the performance rubric separately asks about target pitch, counted rest, the same string, and teacher-confirmed comfortable movement.
7. Choose one useful check for the next attempt
On paper, plan A3–E3–E3–A3 with finger 1 on D. Write four position labels and list the boundaries that need a shift. Finish your answer before reading on.

Write one position label per bar and list the boundaries needing a shift. Complete the plan before looking at the worked answer.
Finish your written plan before checking the worked version below. The starting fourth-position anchor must be established with your teacher before you play.

Worked answer: IV–I–I–IV. Prepare a return after the first A, stay for the repeated E, then prepare the ascent before the final A.
Check: IV–I–I–IV; change after bars 1 and 3, and stay after bar 2. The repeated E requires no position change. Count every rest, then check the final stopped A against open A separately. Use the route-check exercise for further paper planning within the same two-position vocabulary.

Choose the next step from your observation: pitch, timing, or movement. Record a match as well as a miss or uncertainty.
Write one observation immediately afterward: “A was low,” “I played before the next 1,” or “The return felt uncomfortable.” Choose the next action from that evidence. For a pitch question, hear and establish the destination again. For a counting question, count without playing. For a movement question, return to the teacher’s demonstration.
A useful practice entry might read: “E–A–A–E; A matched open A; final E uncertain; rests counted; ask about the return.” That describes one attempt without giving it a misleading overall score. On another day, use the same line and compare observations. There is no required number of repetitions before you are allowed to ask for help.
If your paper answers and playing disagree, preserve both observations. You might have marked IV correctly yet played the A on the open string, or counted the rest correctly yet missed the pitch. Check the string instruction and reference again. That distinction helps your teacher choose whether to revisit reading, listening, counting, or the physical demonstration.
End by saying the whole plan once: “E with 1 in I; rest; A with 1 in IV; rest; repeat A; rest; E with 1 in I; rest.” Then close the music. Being able to explain the route gives you a clear starting point for the next supervised attempt.
Free worksheets for this lesson
- One Finger, Two Positions — two D-string anchors, the separate A reference, and the four-bar route.
- Mark the Position Before the Shift — position choices, change boundaries, and read/rest/play routes with a checking rubric.
- The Bass Clef & the Grand Staff — review the bass staff’s F line and note names.
- The Half Note — recognize a half note and count its two quarter-note beats in 4/4.
- Hearing Intervals — compare interval direction and distance by ear.
Your goal is a planned move between two recognizable notes: same D string, same first finger, two positions, and a counted rest. A Tissimo teacher can listen to both arrivals and watch the movement that a pitch recording cannot assess. Bring your marked route and one concrete observation to the lesson.
Sources
- Shifting, Positions and Extensions — Cello Online
- Cello Fingering Chart — Cello Online
- The Essential Cello — Yamaha
- Octave Registers — University of Puget Sound
- Notation — University of Puget Sound
- Durational Symbols — University of Puget Sound
- Pitch, Loudness and Timbre — University of New South Wales
- Cello: Notation — Vienna Symphonic Library
- Shifting from First to Fourth Position and Vice Versa — Davidoff, translated by Miranda Wilson
- Time Signature — University of Puget Sound
Read this article online: https://tissimo.co/articles/cello-first-to-fourth-position-d-string



Comments