 Back

Gentle Singing Warmup: Hum, Rest, and Keep Your Starting Pitch
Your teacher plays a starting note, demonstrates a quiet hum, and asks you to return to that same note after a small rise. You finish, leave the silence, and listen. The next attempt can begin in exactly the same place. A useful singing warmup does not need to become a ladder of higher notes.
This lesson uses three different pitches in the order 1–2–3–2–1, first as a hum and then on a vowel your teacher chooses. You will learn the shape, count its pauses, and write down the pitch and sound that worked in your lesson. Keep My Comfortable Warmup beside you as a choice card, with space for your own starting note and octave.
The small, repeating shape lets you compare a hum with a vowel without learning a new melody at the same time. Returning to the same start also lets you repeat that comparison without adding a higher pitch. This is one teacher-selected task within a warmup; ask your teacher what other preparation and repertoire work belong in today’s lesson.
1. Let your teacher choose the starting pitch, octave, and sound
Begin by asking your teacher to demonstrate the complete little pattern in a comfortable part of your voice. Listen before joining. Stop immediately if an attempt feels uncomfortable; you do not need to finish a note or rest bar first. Confirm four things: the starting pitch, its octave, the sound to use, and a comfortable dynamic, or loudness. A note printed on a page supplies a reference; it cannot choose these things for you.
Trinity College London’s warmup guide gathers teachers’ approaches, including comfortable-register humming and moving from humming to vowels. Those teaching examples inform this lesson’s starting point. The particular three-note pattern and pauses below are a small practice choice to discuss with your teacher, rather than a universal warmup prescription.

Fill the four fields before the first attempt. Write the full note name, including any sharp or flat, and its octave number. Ask for a demonstration of the sound and agree on dynamic and timing.
Write the full note name and octave number, such as C4 or F♯4. Here, C4 means middle C; C3 is the C one octave below it, as explained in the University of Puget Sound’s octave-register lesson. “Start on C” leaves an important question unanswered. Have your teacher play or sing the exact reference you will use, then enter it on the card.

C4 is middle C, on the ledger line below the treble staff. C3 is one octave lower, in the second space of the bass staff. Each reference lasts two beats, followed by two silent beats.
Before leaving the lesson, make sure you know how to find that reference again. Your teacher might play it on an instrument or point to the matching starting-tone reference on the companion sheet. Listen first, then begin when you are ready. If a recording is in a different octave from your written choice, ask which reference to use rather than following it automatically.
There is no starting note assigned to your age, gender, or favorite singer here. If the teacher chooses another pitch or octave, use that choice throughout your attempt. You can still follow the same route. If you cannot identify the reference confidently, ask to hear it again before singing; guessing the octave adds an unnecessary problem.
2. Learn the three-note contour before singing
Read the route as “start, step up, step up, step down, return.” There are five note events but only three different pitches. In the C4 example they are C4–D4–E4–D4–C4. The top E occurs once; the middle D occurs on the way up and again on the way back. Point through the five events while your teacher demonstrates.

Five events use three pitches: C4–D4–E4–D4–C4, labeled 1–2–3–2–1. Four quarter notes lead to a two-beat C, a two-beat rest, and a whole silent bar.
Here, 1 is the starting note, and 2 and 3 are the next two notes of the major scale beginning on that note. The route is 1–2–3–2–1. You do not have to sing the numbers aloud. Your task is to recognize the small rise and return before adding the teacher’s chosen sound. Trace the direction with a finger on the page while listening, without trying to imitate a singer’s volume.

Trace two rises and two falls, returning to the starting height. This direction map does not show duration; use the notation for note lengths and rests.
The two upward moves are whole steps: C to D and D to E. Each is a major second, two half steps; the outside span C to E is a major third, four half steps. Major & minor 2nds and 3rds supplies keyboard comparisons for these distances. Count the starting letter as 1: C–D spans two letter names, and C–D–E spans three. Then count adjacent piano-key moves, including black keys: C–C♯–D is two half steps; C–C♯–D–D♯–E is four. Letter count gives second or third; half-step count gives the major quality in these examples.

C–D is a major second (two half steps); C–E is a major third (four). These two-half-note comparisons show interval size, not the warmup rhythm.
Try a silent reading check: point to the top note, then to the final note. The answers in the C example are E4 and C4. Next point to the first rest. It comes after the last C, not at the top of the rise. These little checks let you understand where the sound goes and where it ends without making another vocal attempt.
Keep this separate from a sight-singing test. You may learn the pattern by listening and pointing, with the teacher providing its pitches. If you accidentally skip D and go straight from C to E, listen to the three-note rise again. Identify the missing middle pitch before another attempt; repeating the whole pattern without that check can preserve the same mistake.
3. Hum one comfortable pattern
Have your teacher demonstrate the hum you will use. Hear the starting reference, then ask your teacher to establish the agreed pulse and give a four-beat count-in. Begin the first note on the following beat 1. Hum the five-note route at the demonstrated comfortable level while your teacher counts or points through the bars. The count-in is preparation, not an extra bar of the printed unit. Follow the demonstrated sound rather than searching for a special facial vibration or trying to make the hum louder. Tell your teacher if producing it feels awkward. They can choose a different sound or leave singing for another time.
In the written example, bar 1 contains four quarter notes: C, D, E, D. Bar 2 begins with C as a half note, followed by a half rest. Bar 3 is entirely silent. Breathe as needed; you do not have to finish the phrase on one breath. If the written timing is difficult to complete comfortably, pause and ask your teacher to shorten or adapt the phrase before another attempt. Do not stretch a breath to complete the printed notes.

Hum and vowel use identical notes, lengths, and rests. Try the lower row only after the hum, its pause, and agreement with your teacher.
After the attempt, pause before discussing it. Separate what you heard from what you felt: “I returned to C, but the top note felt uncomfortable” gives your teacher two useful observations. A pitch can be correct while the attempt feels wrong. Stop that attempt and explain; a matching piano note does not settle the question of how you produced it.
Use three separate questions after the pause. Did you begin on the agreed reference? Did the route rise twice and return? Did you leave the written silence? Your teacher can help answer these musical questions. Add your own report of comfort separately. A neat set of musical answers does not cancel a concern about how the attempt felt.
If you lose the route, let the teacher demonstrate again while you listen. If counting distracts you, let the teacher count or point through the bars. There is no need to solve pitch, notation, and the new vocal sound simultaneously. Keep the first attempt small enough that you can report what happened instead of guessing afterward.
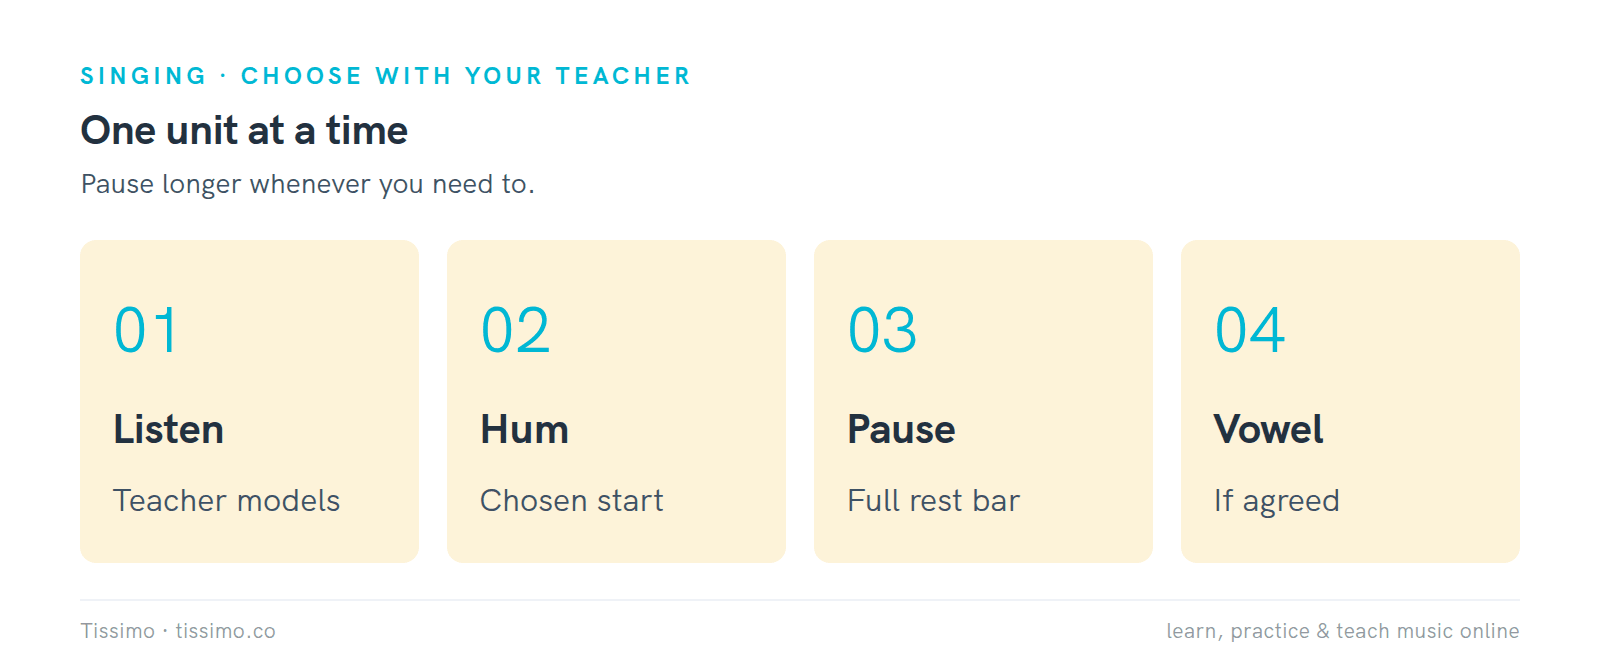
Listen, hum the chosen pattern, leave the rest bar, then try the vowel if agreed. Pause longer whenever needed.
4. Repeat on the teacher’s chosen vowel
Only after the hum and its pause, agree whether to try the same route on a vowel. For example, your teacher might demonstrate “ee.” Copy the demonstrated vowel, starting note, and comfortable dynamic. There is no required vowel for every reader, and a word on the page cannot specify the mouth shape your teacher wants to hear.
Use the same pitch reference again before starting. Keep C–D–E–D–C if C4 was selected, or keep your own transposed version. You are changing the sound while preserving the route and rests. Avoid adding a new consonant on every note unless your teacher specifically asks for that variation; make the comparison you agreed to make.

For the hum-to-vowel comparison, keep the starting note and octave, route, rhythm, rests, tempo, and demonstrated dynamic the same. Change the sound after hearing the teacher’s vowel model.
Listen for the change in tone color while checking that the pitches still follow the same rise and return. Ask your teacher to compare the attempts too. A change in the color of the sound does not, by itself, mean that you changed pitch. If you are unsure, hear the reference again rather than trying to correct everything by singing louder.
If the vowel feels less comfortable, say so and stop the comparison. Your teacher can retain the hum, choose another sound, or end the task. You do not need to work through a collection of vowels to complete this lesson. The useful result is a clear, agreed choice that you can remember at the next lesson.
5. Leave a complete rest bar
Count the written unit in 4/4: four quarter-note beats per bar. In bar 2, the final C lasts through beats 1 and 2; stop sounding for beats 3 and 4. Then leave all four beats of bar 3 silent. The Rests shows the half rest and whole-measure rest, with a tap-and-count example for following silence.

Bars 2–3 of the unit: hold C for beats 1–2, release at beat 3, then count six silent beats across the half rest and the complete next bar.
The half rest sits on top of the middle staff line; the whole-measure rest hangs below the fourth line, counting staff lines from the bottom. In this 4/4 example they mean two silent beats and four silent beats respectively. One gives two silent beats at the end of bar 2; the other leaves the whole next measure empty. The beat continues while your voice is silent. You can follow it with a finger or listen to the teacher’s count without humming through the gap.

Each row has four beats. The two C cells in bar 2 represent one half note, not two attacks. Six sounding beats plus six silent beats make twelve seconds at quarter note = 60.
The unit contains six sounding beats and six silent beats. At quarter note = 60, each beat lasts one second, so the reference unit lasts twelve seconds. That arithmetic describes the score’s timing. It does not set a breath-capacity goal, a minimum recovery period, or a required pace for your voice. Your teacher can adapt the task, and you may pause longer.
Tempo & the Metronome explains the relationship between a beat and a metronome mark. Use it to understand the count, not as an instruction to raise the speed of this warmup. The Open University’s time-values lesson also explains why a half note lasts twice as long as a quarter note.
A silent count through all three bars is a useful preparation. Tap four equal beats for each bar, point to the four quarter notes in bar 1, then keep your finger beside the half note for two beats in bar 2. Move to the half rest for the remaining two. Finish with four silent counts in bar 3, without adding another note.
Before any repetition, finish the silent bar and check whether you want another attempt. After counting beat 4 of bar 3, you may stop counting and take as much additional time as you need before deciding what comes next. The silence gives you a place to listen, settle, and speak with your teacher instead of letting one attempt run directly into the next.
6. Keep or change the starting pitch only by agreement
Repeating the pattern can mean using precisely the same starting note. If C4 was comfortable and your teacher wants another comparison, hear C4 again and repeat there. No upward arrow is hidden in the word “repeat.” On My Comfortable Warmup, mark the chosen option so you do not mistake the three printed references for a required sequence.

Both units begin on C4 and finish with a complete rest bar. The second attempt retains the same starting pitch.
If you agree to transpose, move the whole route while preserving its distances. Starting on D4 gives D4–E4–F♯4–E4–D4. Starting on E4 gives E4–F♯4–G♯4–F♯4–E4. The sharps matter: D–E–F natural would make the second upward move a half step. Say the new note names with your teacher before trying a changed reference. In the E4 row, the sharp before the first F also applies to the returning F in that same bar and octave. The return is F♯ even though its sharp sign is not repeated.

D4–E4–F♯4–E4–D4 and E4–F♯4–G♯4–F♯4–E4 retain the same distances, rhythm, and rests. These are alternative references, not successive steps.
You can also relocate the whole pattern by an octave when your teacher chooses. C3–D3–E3–D3–C3 has the same route as the C4 version, twelve half steps lower throughout. Moving only the highest note to another octave would change the route. Ask for a complete demonstration of your chosen version, then write its actual starting note and octave.

C3–D3–E3–D3–C3 moves every pitch twelve half steps below the C4 version. The route and written timing remain unchanged.
Check the highest note as well as the first one. For a paper example, suppose a fictional teacher has allowed D4 through F♯4, including both endpoints. The C4 option starts too low. The D4 option fits. The E4 option starts inside the window but rises to G♯4 outside it. A suitable first note alone does not make the whole pattern fit.

Only the D4 option fits the fictional inclusive D4–F♯4 window. C4 falls below it; G♯4 rises above it. These compact pitch-set strips are not the full warmup rhythm.
That paper answer checks note membership, not someone’s real vocal comfort. Your teacher still listens to the attempt and you still report how it feels. Do not discover your own limits by testing progressively higher options. If none of the printed references suits the lesson, your teacher can write another; the card is a record of the choice, not a menu you must finish.
7. Record the useful choice, and stop if uncomfortable
Before putting the card away, fill in enough detail to reproduce the agreed task: note and octave, hum or chosen vowel, comfortable dynamic, and any pacing instructions. Write the next decision too, such as “keep this start; ask before changing.” A bare tick beside “done” cannot tell you which version to use when you return.

This fictional D4 record includes the sound, dynamic, timing, and next decision. Record any changes to note lengths, pace, or pauses here too.
Check your record by explaining it aloud without singing again: “I start on D4, follow D–E–F♯–E–D, and leave the rest bar.” Have your teacher confirm the written octave. If a parent helps at home, their useful job is to bring out that record and notice the pause, rather than choose a higher note or judge vocal technique.
At the next session, read your previous choice before making a sound, then check it with your teacher. The record describes an earlier agreement; you can revise it together. If you are uncertain at home about the note, octave, or sound, keep the question for the lesson. Reading the contour and counting its rests silently still lets you prepare without guessing a vocal instruction.
If you write “comfortable” beside an attempt, add one musical detail that will help you remember it: “same D4 start,” “waited through bar 3,” or “asked to hear the reference again.” Keep the note short enough to use next time. The record is for following the agreed task, so you can leave out judgments about whether your voice sounds like someone else’s.
The companion card includes the full unit, three compact C4/D4/E4 pitch-reference options, and a fictional range-selection question. Its personal-choice check asks whether the fields are complete. Use those two checks differently: the printed question has a note-based answer, while the choice for your own voice needs your teacher’s demonstration and your response to it.

Record a comfortable choice, pause and ask when uncertain, and stop an uncomfortable attempt.
If singing feels uncomfortable, stop and tell your teacher. Avoid singing when your voice is hoarse or tired; the National Institute on Deafness and Other Communication Disorders advises this and recommends medical consultation for suspected voice problems. Bring persistent concerns to a qualified health professional. This small pattern is not a treatment for hoarseness or a test of vocal health.
A neutral piano reference can help you hear the starting pitch, contour, and count. It cannot demonstrate a healthy hum, check your vowel production, or decide that your voice is ready for more. Let your teacher supply the vocal model. In a live Tissimo lesson, you can ask a teacher to listen and help record a comfortable version before you move into repertoire.
Free worksheets for this lesson
- My Comfortable Warmup — record your teacher’s starting pitch, octave, sound, and dynamic; follow the full unit and compare three optional pitch references.
- Major & minor 2nds and 3rds — compare interval sizes on the keyboard, including the major second and major third used here.
- The Rests — recognize quarter, half, and whole-measure rests and count through a silent measure.
- Tempo & the Metronome — understand beat speed and metronome marks; keep this warmup’s pace teacher-selected.
Sources
- Effective warm-ups — Trinity College London
- Octave Registers — University of Puget Sound
- How to Identify Perfect, Major, and Minor Intervals — University of Puget Sound
- Time Signature — University of Puget Sound
- Durational Symbols — University of Puget Sound
- Time values — The Open University
- Taking Care of Your Voice — NIDCD
Read this article online: https://tissimo.co/articles/singing-warmup-hum-three-note-pattern



Comments